Living Green With Pets: What Could be Greener, or….Redder?
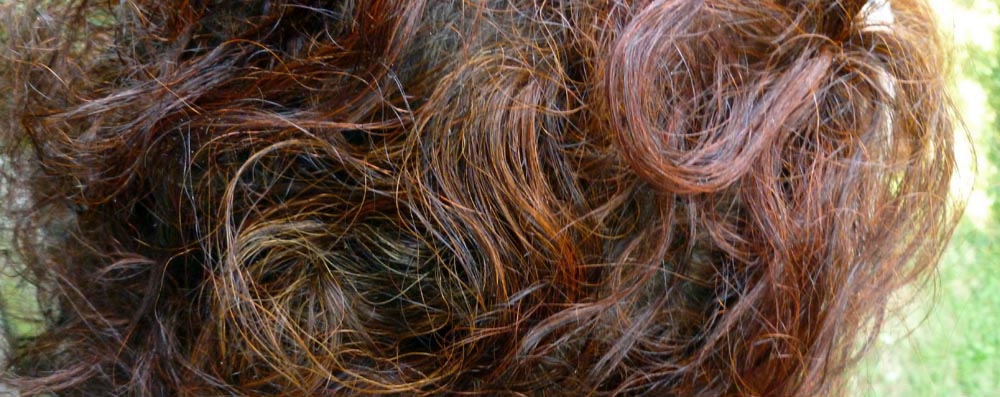
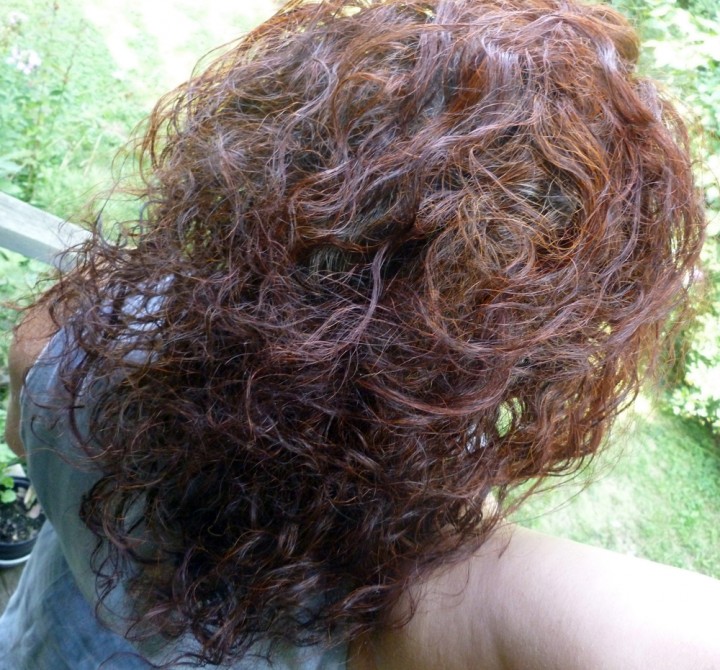
I like colors, bright, vibrant colors. That would include my hair, and I can get away with vivid hair as an artist in shows and festivals. All other times, my cats really couldn’t care less.
So what does hair color have to do with cats? It’s part of keeping toxins out of your home and away from your pets, and choosing products that involve no animal testing at all. Besides that, you’ll love their expressions when they look at me with goop in my hair…
More on my reasons for color at the end of this article, but after trying salon color and drugstore color, chemically-laden and cruelly tested on animals, and imported color, not so toxic nor animal-tested but inconvenient, I remembered henna, the ages-old dye made from dried, crushed and sifted leaves of the henna plant.
Lawsonia inermis, sometimes called mignonette tree, is native to and cultivated in the Middle East and sub-tropical regions around the world, so it’s also a totally renewable resource. This powder made from the leaves, mixed with an acidic substance such as citrus juice or tea or even yogurt, will dye anything it touches. That’s all there is to it, no additives or chemicals, the whole mix is actually edible, if you wanted to, but it’s certainly non-toxic and never tested on animals for any reason.

So, one day before a festival several years ago I plastered it into my hair and have used it ever since. The color is the most permanent I have ever experienced, even on my gray, which resists any other dye, and it also leaves the streaks in my hair which other commercial hair dyes had completely covered up. I am complimented by total strangers on my hair color, and since many people have asked me about it, and I like to be able to promote less-toxic animal-friendly alternatives in the home and lifestyle, I’ve decided to write a little article explaining its use and application.
Purchasing henna
You can find henna in many places on the internet since it’s also popular for body art and henna tattoos, but I purchase mine from a local Indian grocery. Even the Indian grocery I visit regularly stocks several different brands of henna, each in different packaging—boxes, bags, plastic containers—so I can’t recommend a brand. However, the henna should simply be “premium export quality”, and the container should only hold the dry powder of crushed leaves, no other ingredients. The packages I purchase usually hold 150g or around 5 oz., and rarely cost more than $2.00. Yes, the price is right.
I have also found it at natural food stores and my local food co-op along with other “variations”. One thing to be aware of is that henna does NOT come in colors. It may vary slightly in its natural shade of red earth (more on that below), but if it is a color such as “black henna” or “mahogany henna” or the package includes anything else in addition to the powder, it is not simply henna but has other substances included which may simply be hair dye. Please read carefully, and understand that it may not react according to these instructions.
Your hair itself and your own constitution also influence the color as well, so you’ll need to do a little experimentation with different brands and with mixing, as described below. I tried all the brands at my Indian grocery and found that one in particular gives me the deep copper I like best.
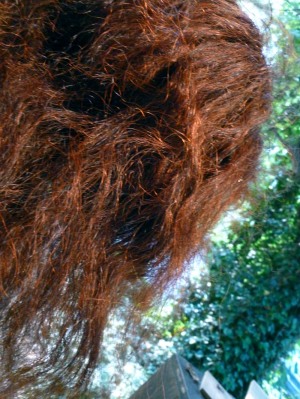
What color will it turn out?
It depends in part on your hair, though the color will always be a shade of red but fairly deep. My hair was always a warm chestnut, though that dulled when it turned gray, so I’m working with mostly gray hair, and it turns out a deep red with copper highlights and lighter streaks.
Preparing henna
True henna needs to be prepared and to sit overnight in the acidic liquid in order for the dried leaf powder to absorb the acid and release the color, so plan for this when you prepare. Also bear in mind that the paste should be on your hair for two hours minimum, up to six hours optimally, and takes some time to rinse out. Plan to spend some time!
How much to use
A little bit goes a long way too—I have thick, curly hair and when it was just past my shoulders I could get away with using half the package, preparing the entire thing and freezing the unused portion, thawing it in much less time than it takes to mix and prepare.
Now that my hair is about halfway down my back, I use the entire package; it’s a little more than I need but there’s no sense in keeping less than I can use for one application.
If your hair is short, try using only one quarter of the package—you’ll be able to judge better when you read about applying it, below, and you’ll know after the first time you apply it how much to use after that.
Mixing the powder
Try to use all non-metal implements, and remember that henna stains everything, deeper for the amount of time it sits on the item. I use one plastic bowl that is shaped for easy mixing and also has a lid so I can toss it in the freezer if there is a second batch left, and I use a plastic fork to mix and apply it because the tines both whisk the mixture and comb it into my hair. You can use other implements or even your fingers. Have latex or rubber gloves on hand as well.
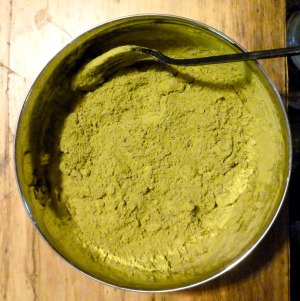
You’ll need a half-cup or so of your liquid on hand. The powder is very fine and a rich green and smells like either hay or grass. Pour it into a one-quart bowl of your choice and add your liquid a tablespoon or two at a time, mixing thoroughly in between.
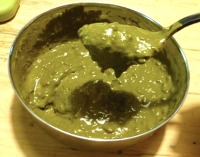
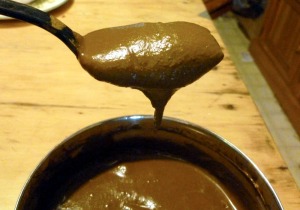
The resulting mixture should be smooth and thick, like yogurt or pudding—it is slightly pourable but neither drips nor sits in a glob. It’s important that it’s not too thin, like pancake batter for instance, or it will drip off your hair causing a big mess, or too thick or the color won’t release from the powder and won’t color your hair well enough.
I’ve also used plain yogurt to mix as yogurt is acidic enough and it also acts as a conditioner for your hair. It’s a little easier to apply because the mix has more body to it, and it’s a little easier to rinse out because it doesn’t stiffen as it dries on your hair. The resulting color is about the same. I try to remember to have it on hand, though I don’t always.
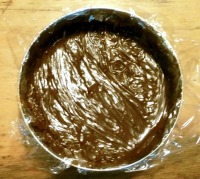
Cover the mixture with plastic, laying it on the top of the mixture or wrapping the bowl so it’s airtight and doesn’t dry out, keeping it in a fairly warm place, for at least six hours, preferably eight to ten. When it’s ready, the color will have changed from green to the characteristic rich red.
Slightly modifying the color
Some instructions say that you can deepen the color by mixing it in a metal bowl, and I use a stainless bowl but it’s not made much difference. I’ve also followed instructions to add really strong tea or coffee, beet juice and various other things, and I do use strong tea, but the brand I buy has the most influence.
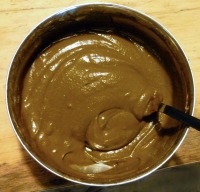
Applying your henna
If you’ve ever colored your own hair, prepare yourself and your space the same way. If not, remember that wherever henna drips and sits for only a few minutes you’ll have a red stain on your skin, your floor, counter or anywhere it touches, and to cover everything that may be dripped or splashed on. I do this at my kitchen sink.
Apply something like petroleum jelly or something similarly thick and moisture resistant to your hairline, face and neck that will stay on the entire time the henna is on your hair.
Put on your gloves!
You can dampen your hair a little to make it more manageable, but it should not be completely wet or your mix will drip out of your hair. Part your hair in sections, and apply the henna along the part, gently massaging it into your hair. Next apply it to the length of your hair beginning where you’ve applied it to the roots and working your way down being careful not to tangle your hair. You can work one section completely and clip it out of the way, or do all your roots first, then the length of your hair. I do my roots first, then gather the length of my hair all in a bundle and work the henna into it from my head down to the ends, applying it to the surface of my hair, then squeezing it into my hair.
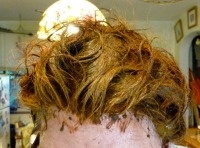
I usually pile it on top of my head then, and use a big clip to hold it up there. It should pretty much stay in place as if you’ve put molding mud into it, though the clip helps.
Check in the mirror to see that your hair is evenly covered, check your hairline and add any you think is necessary.
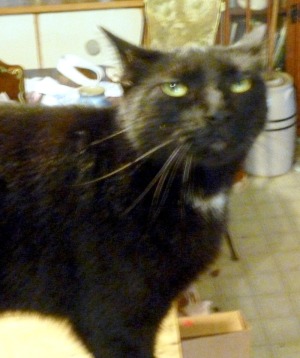
Or look at your cats. If they look particularly shocked, you’re probably doing it right.
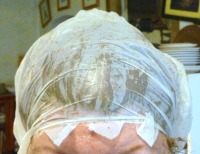
For the time it’s on your hair it sets best and quickest if you keep it warm and moist because it loses its effectiveness once it’s dry. You can wrap a damp towel around first, and add a plastic bag on top, or just use the bag. Plan for at least two hours, though if you go for the full six to eight you’ll get the best color. I usually go about four hours, though sometimes I’ll literally sleep on it. Alternately, in the summer, I go out and work in my yard, plastic bag and all because the warmth from the sun and from my exertions helps it to set, and I have to shower when I come in anyway. My neighbors accept me as a little eccentric so I can get away with this.
Rinsing
Put your gloves back on! The yogurt mixture is a little easier to rinse out, but in any case begin by soaking your hair in a sink of water if you can, then let water run over it from a faucet, massaging the henna back out of your hair.
You can continue rinsing and rinsing until it runs clear, but I’ve found that applying conditioner after you’ve got your hair softened and letting it sit for five minutes will help loosen and rinse out the rest. Just make sure that the water really runs clear, even rub a light-colored towel through your hair to make sure it’s all rinsed out.
You can rinse with vinegar to set the color and restore the pH to your hair.
Style as usual
Just like all the other products say, style your hair and dry it and you’re good to go! Don’t wash it for about 24 hours to let the color set completely. The color is pretty bright on the first day, then settles down to its permanent shade in about three days. I don’t worry about this—I’ve done my hair in the morning before an afternoon or evening event.
Be sure you want the color!
This color will not wash out, nor will it fade, you really have to wait for it to grow out, but you can use other colors with it if you don’t like the effect and want to cover it up.
Hypothyroidism, and how I came to color my hair
I had never intended to color my hair on a regular basis, deciding that when the time came I’d just go gray naturally. And if it had happened more slowly and a decade later than it did I might have actually accepted that, but I found myself at 40 suddenly a little more salt than pepper and feeling the effects of an underactive thyroid, and decided that I needed to perk up my hair color on a more permanent basis to make me feel more my age.
In my late 30s, someone guessed my age as late 20s, questioning the years of experience I had in commercial art. I left my day job in January 2000 at age 39 to work at home, but in the next months and years I found myself organizing care and housing for my brother after his traumatic brain injury in April 2000 and my mother with lung cancer in May 2001, shortly thereafter finding my thyroid had pretty much just gone out like a light bulb and being diagnosed with hypothyroid disease.
My hair had always been a rich brown and had turned chestnut with lighter streaks from being outdoors all the time. I also had a silver streak which I adored that had grown from the center of my forehead and pretty much down the length of my hair, and little bits of silver wings at my temples, but no other gray.
My hair faded and became increasingly salt and pepper, my skin tone changed and even the shape of my face, neck and shoulders changed, all in less than a year. I was only 41, and where I’d looked ten years younger a few years before, I now looked ten years older. Plus my brother and mother were critically ill. Lest the hair coloring seem frivolous, it was at least something I could do to change the look of things.
I had my hair professionally colored once, at the cost of $125.00. It felt like a chemical bath and the color was lovely for about a week. Then I tried coloring it myself with coloring I could buy. More chemicals, this time in my house. And worst of all, these products not only felt toxic but they were regularly tested on animals in labs as part of US health and safety and patent regulations. I have always avoided products tested on animals, and I didn’t want any parts of that.
I found an Italian hair color called Herbatint based on propylene glycol that was not tested on animals and was much less toxic than the other formulas, expensive, but great color, though inconvenient to find, but I used it for several years.
My poor hair
In high school I did just about everything to my hair that could be done—color, stripping, streaking, frosting, perming, straightening, it’s a wonder I have any hair left. It’s always been kind of wild and unmanageable and I’ve always tried to find the magic solution to keeping it under control. I continued straightening it for years but gave that up. As a consequence of all that treatment I did damage my hair and scalp, and then spent years with natural treatments to try to restore it to the best health I could. That’s why I didn’t care for the chemical color treatments, and while I did mix up a few colors of my own from walnut shells and beet juice from my experience in natural colors, it was messy and ineffective. Then the henna.
The college I attended had a number of Iranian students and I remember seeing my friend Haleh giving her thick dark hair a henna treatment one afternoon in the dorm laundry room. I tried it then, but henna was difficult to find before international grocery stores and the internet. Now it’s not so hard to find.
Note about using henna or any other product
Before the first time you use henna or any other product on your skin, mix up a little and do a skin test and sniff it to see if you have any reaction to it. If you develop a rash or respiratory issues or any other suspicious response, just don’t use it. Remember that it’s going to be on your head for at least two hours, and you’ll be absorbing it into your hair and scalp. And even though it would be safe to eat, I haven’t even tested it that way, I’d advise against it.
Products certified to be cruelty-free
Check The Leaping Bunny for many alternatives available worldwide for products manufactured by companies certified to use no animal testing in any of their products, and look for the Leaping Bunny logo when you shop.
________________________________
All images used on this site are copyrighted to Bernadette E. Kazmarski unless otherwise noted and may not be used without my written permission. Please ask if you are interested in purchasing one as a print, or to use in a print or internet publication.


Pingback: The Creative Cat - Living Green With Pets: Look for the Leaping Bunny
Hi, Bernadette, I loved reading this, it bought back so many memories of piling organic-smelling, poop-looking gloop on my head n working it in.. n having inadvertently dyed my ears orange!! I was interested in your preparation routine. I suspect you’ll get as many versions of that as there are commentators. I used to use boiling water with a squirt of lemon jiuce to mix the henna.. which stayed greeny brown, then, use it straightaway, while it was still hot. Wrap in plastic, then in old towel.. n run the occasional hair-dryer over it all.. as I squelched it all in place for the next couple of hours. I don’t do it now ‘cos I have a lot of grey, but I used Love that henna took differently on each of the different coloured n textured hairs that we each have on our heads.. so a full n natural colour range was achieved. [I was disappointed when the Herbatint produced just one colour for each n every hair]
I loved the flamboyance of the henna’s colour on my long, or short, curly dark blonde, then light brown hair.. much more “Me”, I always thought!! I’ve a wedding to go to on 23rd June n was thinking of colouring my hair for the [rare] occasion.. am inspired to maybe have one last go at henna.
Loved this trip down memory lane, Bee. I bet your hair looks Absolutely Phenomenal!!! xxx
Annie, another henna user! How exciting–I’m always surprised when people actually know what it is, even though it’s not that uncommon. Yes, it smells very green and especially when it’s fully charged it looks like vile poop. I have an orange streak on my neck where it dripped and I didn’t realize.
A few years ago the gloves I got were really cheap and my fingernails poked through them as I applied the henna. We have a Turkish family in town who run a pizza and Turkish food take-out place, and when I went in with orange fingertips and fingernails, one of the girls, who I knew already, looked at my hands and then at my hair and said “You use henna!” We have a special bond now!
Definitely for summer, Annie, go as a copper-top!
Goodness! You have beautiful hair, Bernadette 🙂
I think I mentioned before my hair is completely white now, but I cannot stand lookng like my mother, so soften it with a blonde colour. However, I am concerned about the toxicity of the normal way of dyeing and also the animal cruelty aspect, which is a no-no! And last time I dyed my hair I was overwhelmed by the fumes, which I have never noticed before!! In fact it made me quite unwell afterwards (I have a compromised immune system, anyway!)
Henna, I think, would be too dark, but have often thought about it, so was very interested to read this. Thanks.
Also loved the eeeeewww! pic! lol
Carolyn, thanks for the compliment! I am vain about my hair, and after all the damage I’d done it’s taken me years to get it to grow again, then the hypothyroidism. I did not look good with mousy salt and pepper hair at age 40; my mother colored her hair until just a year before she died when I could no longer get her to a hairdresser, guess I inherited that!
But if you want to avoid the fumes, you could try the “Herbatint” that I mentioned–no fumes, cruelty free, long lasting, just a little difficult to find here in the states. I was definitely pleased with it. It’s often sold at health food stores and natural groceries, but I’ll bet you can order it online now. Henna would be too dark for you if you’re going with blonde.
Bean’s a great model with that face!
We can get Herbatint here. I might be able to get it locally, if not, I can definitely get it online. Thanks B xox
That “eewww” photo is priceless! I love your hair – it’s gorgeous, and it’s so “you!”
Ingrid, I love that photo and I’d been waiting to use it! Thanks for the compliment on my hair–I’d always intended to let mine gently go silver but that was not to be.